Tuesday, October 30, 2012
Front Brake Hoses
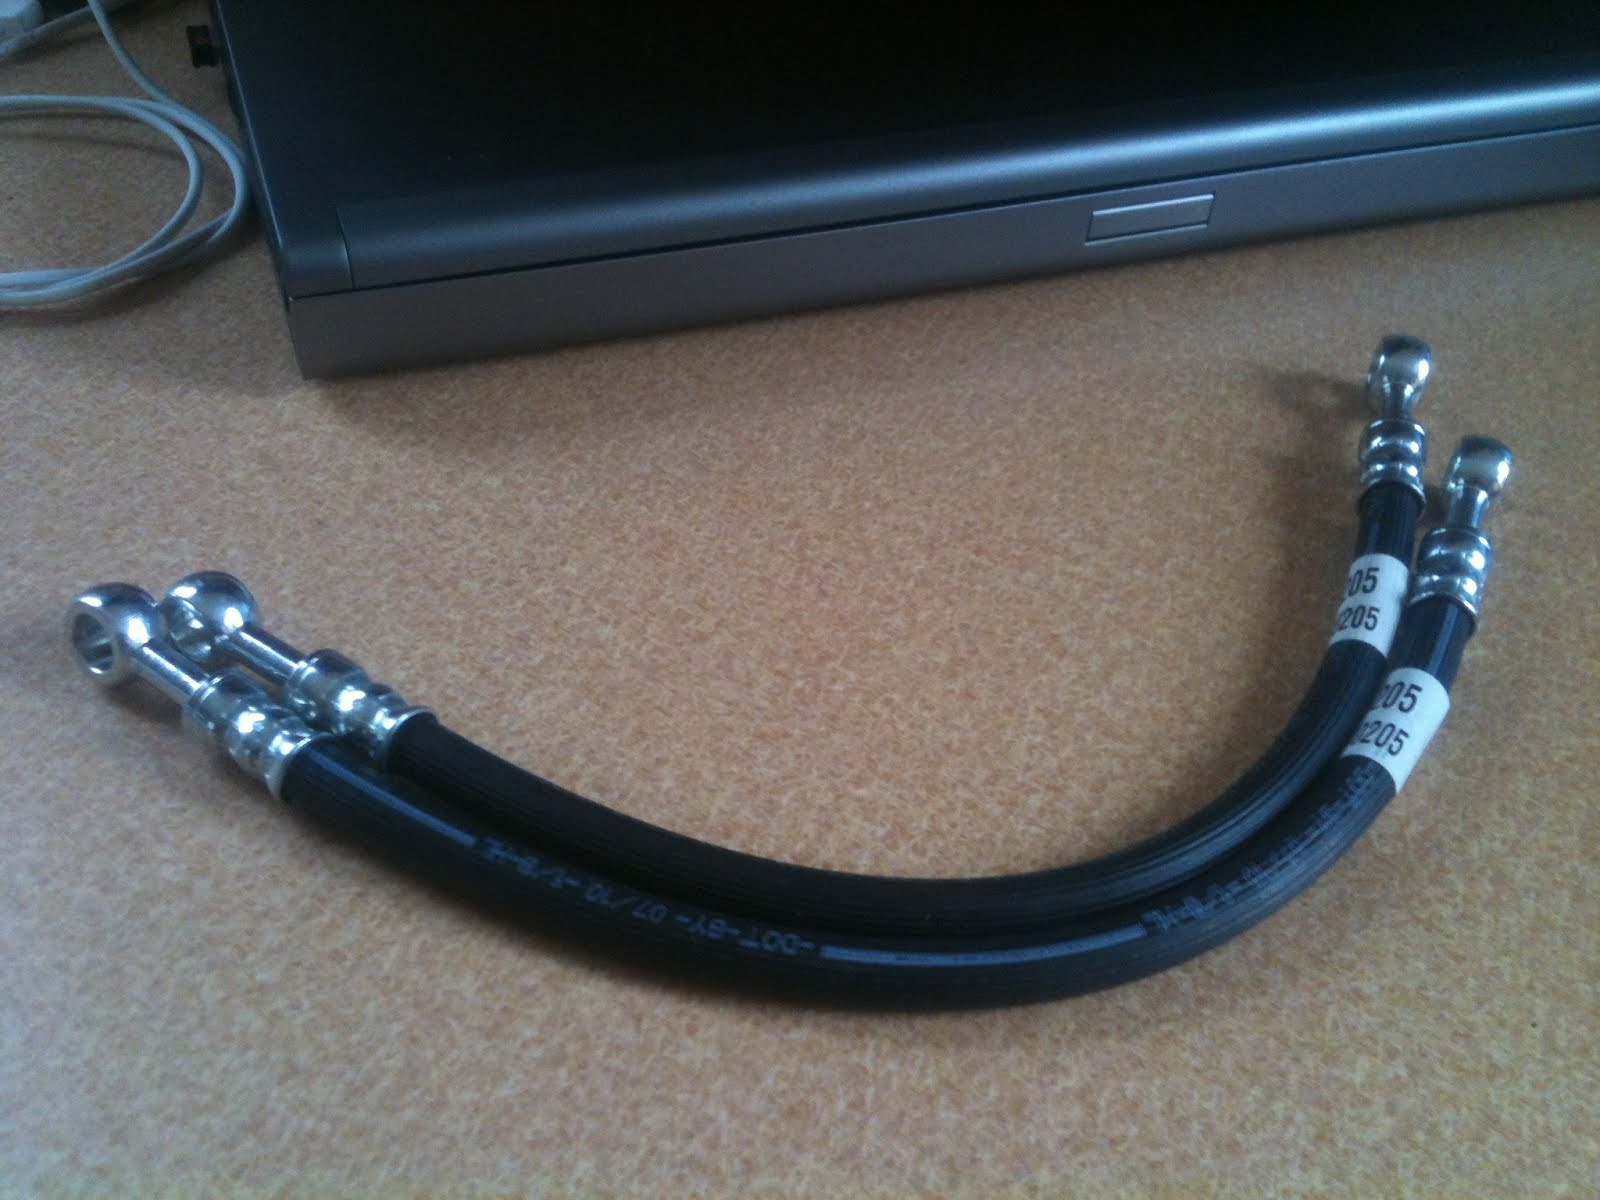
Recieved in the mail today two new front brake hoses. It's amazing they even have the same type of hose as the originals without the wire spring protectors which I still need to find. I now have all the parts I need to assemble the front brakes. Also, I've been finish welding the floor pans which are almost done and will be moving onto the rocker panels soon.


Monday, September 17, 2012
Floor Pans Continued


Monday, September 10, 2012
Fall Brings time for Floors
I was able to spend a good part of Saturday getting the driver's side floor pan fit and ready to weld in place. Pictures to follow.
Friday, March 2, 2012
Behind but not forgotten
I'm really behind on my Honda but I have not given up. Its been a busy year and been doing work on our house mostly. Once I finish up my Kitchen cabinets I plan on getting back on track with the final floor pan replacement welding. Sorry for the delay.
Wednesday, October 19, 2011
Friday, June 17, 2011
New Floor Pan Prep
This morning I fixed the passengers side Floor plan. Here are a few photos of the 4 hours of work. I purchased this front pan from Ray Cave. Ray is a great guy and has just about anything you culd want for used Honda parts. I was originally going to rebuild this from scratch but this turned out to be so much better than fabing this part form scratch
Here is a shot of the pan before I removed it. You can see that all along the diagnal brace its rusted.

The pan the way I got it from Ray.

Shot of the pan removed. I used the lip of the seat brace as the place to join them and the roceker panel edge along the side. Along the front its installed like it was at the factory and at teh tunnel its a butt joint.

Final trial fit before tack welding

Final shot of the pan tack welded in place.

I have the diagonal brace yet to install and then its on to the other side. With any luck I will have teh drivers side done Sunday and I can do the final welding this coming week after work or next weekend. Then its time for a full sand blast for the underside and a couple coats of PPG etching primer and DP epoxy sealer.
Here is a shot of the pan before I removed it. You can see that all along the diagnal brace its rusted.

The pan the way I got it from Ray.

Shot of the pan removed. I used the lip of the seat brace as the place to join them and the roceker panel edge along the side. Along the front its installed like it was at the factory and at teh tunnel its a butt joint.

Final trial fit before tack welding

Final shot of the pan tack welded in place.

I have the diagonal brace yet to install and then its on to the other side. With any luck I will have teh drivers side done Sunday and I can do the final welding this coming week after work or next weekend. Then its time for a full sand blast for the underside and a couple coats of PPG etching primer and DP epoxy sealer.
Wednesday, June 15, 2011
Spring is Here
Its been a while since I posted any progress on my car. I am in the process of installing a new front floor pan I purchased from Ray Cave. Im hoping to get the underside buttoned up and epoxy primed soon, then it's on to bodywork.
In the mean time here is a fun video of a really nice S800, enjoy
In the mean time here is a fun video of a really nice S800, enjoy
Wednesday, January 5, 2011
A new Year and work Continues
Its a new year and I am slowly continuing to work on the floor plan rust repair on te honda. I hope to post some pictures soon.
happy New Year all!
happy New Year all!
Wednesday, August 25, 2010
More Rust Repair
Summer is a busy time for our family, we spend a lot of time at camp and when we are home there are always things to do around the house. I was able to find some time to patch the rust in the driver's front wheel well.
Fitting the patch panel

Finished and welded in place.

I also started on the floor pan, this is a shot of the front drivers seat mounting location, i had to recreate the recessed area where the seat bolts as well as teh surrounding area.

A better shot of the repair waiting for grinding and final welding. These were not fun to make, thankfully only two of them are rusted out the other 6 mounting locations are in fine shape.

Fitting the patch panel

Finished and welded in place.

I also started on the floor pan, this is a shot of the front drivers seat mounting location, i had to recreate the recessed area where the seat bolts as well as teh surrounding area.

A better shot of the repair waiting for grinding and final welding. These were not fun to make, thankfully only two of them are rusted out the other 6 mounting locations are in fine shape.

Monday, June 14, 2010
Update
The update is I have no update.... Ive been busy around the house but will post pics of some rust repair soon.
Wednesday, May 19, 2010
Brake Parts
Here is my brake master cylinder when I took it out of the parts car and tore it down. I was able to remove everything except for the internal piston. After 20 years of sitting it was frozen in there pretty well.

I sent it off to Joe at Sierra Specialty Automotive and this is what I got back a few days ago. First its cleaned, from the looks of it bead blasted to a like new finish. Next, Joe hooks it up to a hydralic pump to remove the internal piston. The inside of the cylinder is then bored out to receive a brass sleave that is then pressed into it. The inside is then bored and polished to the correct diameter and the port holes are drilled.

Picture of the brass sleave.

The last picture is of the cylinder, the pistons that came out and need to be cleaned up and a rebuild kit I got from Miles.

Thanks for such great work Joe. As always thanks to Miles for the parts and your never ending help.

I sent it off to Joe at Sierra Specialty Automotive and this is what I got back a few days ago. First its cleaned, from the looks of it bead blasted to a like new finish. Next, Joe hooks it up to a hydralic pump to remove the internal piston. The inside of the cylinder is then bored out to receive a brass sleave that is then pressed into it. The inside is then bored and polished to the correct diameter and the port holes are drilled.

Picture of the brass sleave.

The last picture is of the cylinder, the pistons that came out and need to be cleaned up and a rebuild kit I got from Miles.

Thanks for such great work Joe. As always thanks to Miles for the parts and your never ending help.
Sunday, May 16, 2010
Body Work Begins
A new chapter has begun. I have started the body work on the 600. My goal is to get the bottom of the car in perfect shape before moving on to cosmetic body work. Today I started with the passengers front wheel well. The bottom rear corner was rusted through.
But first a couple of pics of the car on the spinner I made to work on it.

Floor pan with the majority of the undercoating removed for rust inspection.

Floor pan again.

This is the drivers wheel well and it looks like the passnegers wheel well did before I stared.

Here is the repaired wheel well. I need to finish welding but this gets it pretty much done.

I will be completing one side at a time, for now the passengers side floor pan then move on to the drivers side. Once I fix the majority of the rust holes, of which there a a few along the bottom, I will be replacing the rocker panels then moving onto the rear portion of the car which has mostly surface rust. Once all the floor pan issues are fixed I will media blast the entire pan and wheel wells inside and out and DP epoxy primer it.
My master brake cylinder and the rebuild kit for it are due this week, stay tuned for pictures.
But first a couple of pics of the car on the spinner I made to work on it.

Floor pan with the majority of the undercoating removed for rust inspection.

Floor pan again.

This is the drivers wheel well and it looks like the passnegers wheel well did before I stared.

Here is the repaired wheel well. I need to finish welding but this gets it pretty much done.

I will be completing one side at a time, for now the passengers side floor pan then move on to the drivers side. Once I fix the majority of the rust holes, of which there a a few along the bottom, I will be replacing the rocker panels then moving onto the rear portion of the car which has mostly surface rust. Once all the floor pan issues are fixed I will media blast the entire pan and wheel wells inside and out and DP epoxy primer it.
My master brake cylinder and the rebuild kit for it are due this week, stay tuned for pictures.
Tuesday, May 11, 2010
Still at it
I have been working on the remainder of my parts taht need blasting and painting. I expect to receive my rebuilt master cylinder this week from Sierra. I also have the exhaust bolted up and need to make some new gaskets. I plan on running the engine before I intall it, when I do I will post a video of it.
In the mean time here are a few old photos I found.
.JPG)
.JPG)
In the mean time here are a few old photos I found.
.JPG)
.JPG)
Monday, April 26, 2010
Back
We got back form our family spring vacation yesterday. Obviously I have no Honda update but plan on working on it this week after work. The body is on the rotisserrie and will be moved into the garage next for body work. I will post some pics as soon as i get it in the garage.
Monday, April 12, 2010
Spring
This weekend was spring clean up so not much to report. I did get a chance to mount the body back on the rotissourie but thats about it. I misplaced my camera so I don't have any pictures yet. I am really looking looking forward to starting the body work.
Monday, April 5, 2010
The Reunion
So here it is. I finally mated the engine to the subframe after they had been apart for over 10 years. The engine is slowly being reassembled and has most of the accessories back on. It took a lot of effort to get to this point and I'm really excited to start on the bodywork soon.


Monday, March 29, 2010
Engine Weekend
On Saturday I had time to go to my folks place and get the engine for the Honda. I rebuilt it years ago in their basment and its been there ever since just waiting. Here it is in the trailer waiting to be unloaded. It's attached to a bracket I made that fits a traditional engine stand. It can be rotated in two axis.

A picture of it back on the stand.

Here is the subframe all ready to recieve the engine. I built a cart for it so it can be moved around and used to help assemble it. I am painting the last of the engine mounts and brackets and hope to get the engine on the frame next weekend.

I also have the tires and wheels ready for mounting. 5 fresh wheels and 5 Kumho tires.

Next up after the engine is instaled on the frame is to mount the engine cooling fan, get a new fan belt, install the points and condensor, install the starter, rebuilt axle shafts, lower control arms etc. Plus I am still waiting to hear from Joe about my master cylinder.

A picture of it back on the stand.

Here is the subframe all ready to recieve the engine. I built a cart for it so it can be moved around and used to help assemble it. I am painting the last of the engine mounts and brackets and hope to get the engine on the frame next weekend.

I also have the tires and wheels ready for mounting. 5 fresh wheels and 5 Kumho tires.

Next up after the engine is instaled on the frame is to mount the engine cooling fan, get a new fan belt, install the points and condensor, install the starter, rebuilt axle shafts, lower control arms etc. Plus I am still waiting to hear from Joe about my master cylinder.
Thursday, March 25, 2010
Tuesday, March 23, 2010
Parts
I recieved a few more parts from Miles I needed. The first photo is of gas tank mounting bolts and isolation rubber grommets. Above left is a carb rebuild kit from Bruce. Thanks for the quick shipment on that!

These are grommets for the cooling shrouds on the side of the engine.

Dan pointed me to JC whitney for these almost like original Poly bushings. Notice the original bushing (black) has that big knob on it. No idea why but the new redones will work fine. The distance between the center of the bar hole and where the bushing touches the frame is a little off. I will shim this with some steel as this distance is critical for front wheel orientation. Correct steering geometry is critical.


These are grommets for the cooling shrouds on the side of the engine.

Dan pointed me to JC whitney for these almost like original Poly bushings. Notice the original bushing (black) has that big knob on it. No idea why but the new redones will work fine. The distance between the center of the bar hole and where the bushing touches the frame is a little off. I will shim this with some steel as this distance is critical for front wheel orientation. Correct steering geometry is critical.

Monday, March 22, 2010
Spring
Spring is here and Saturday was fantastic 70 degrees and sunny. We spent the day cleaning out my grandparents house of 60+ years of collected stuff. Had a lot of family and friends to help and it was much appreciated. Sunday I painted a bunch of parts and stacked the rest of teh chord wood we had delivered last month. Expecting some more parts this week and hoping to get the honda body back on the rotissorie so I can get it in the garage. That will be much more fun and interesting than all this littel stuff.
Subscribe to:
Posts (Atom)